Manual installation guide
Is the subscription widget not displaying on your product pages?
If you created a subscription rule and the subscription widget is still not displaying on your product page, then you can either contact us or manually install the app in your theme Liquid files. If you decided to install the app manually, then follow this guide.How does the app work?
On product pages, the app will find the main form element which adds the product to the cart and inject the widget into it.As themes and their HTML structure vary, it may happen that the app won't be able to find a suitable HTML element to inject the widget into. In this case, you have to manually add the target HTML element to your product pages.
Add subscription widget to the product pages in 2.0 themes (the easiest way)
If you are using the theme 2.0, then you can add the widget to your product pages in Shopify Admin -> Online store -> Customize -> select the product template at the top -> click Add block in the Product information section -> select the Subscription widget.
That's it!
Here are the screenshtos on how to do this:
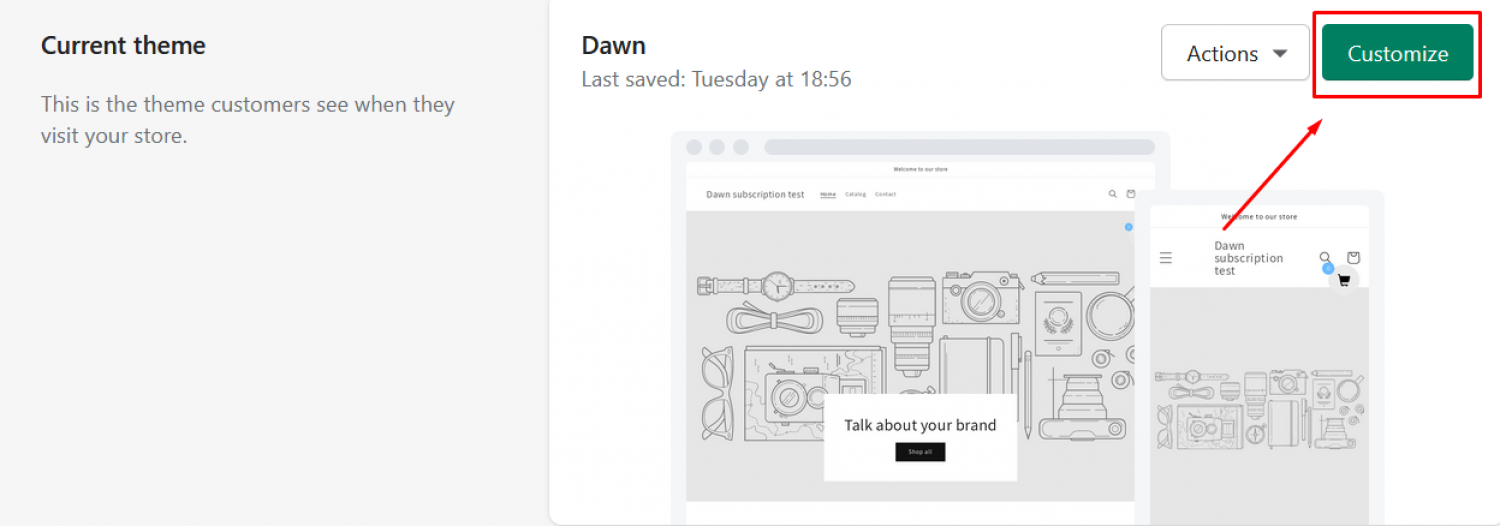
Step 1: Go into Shopify Admin -> Online store -> Customize.
Step 2: Select Products in the page selector (in the center of the header):
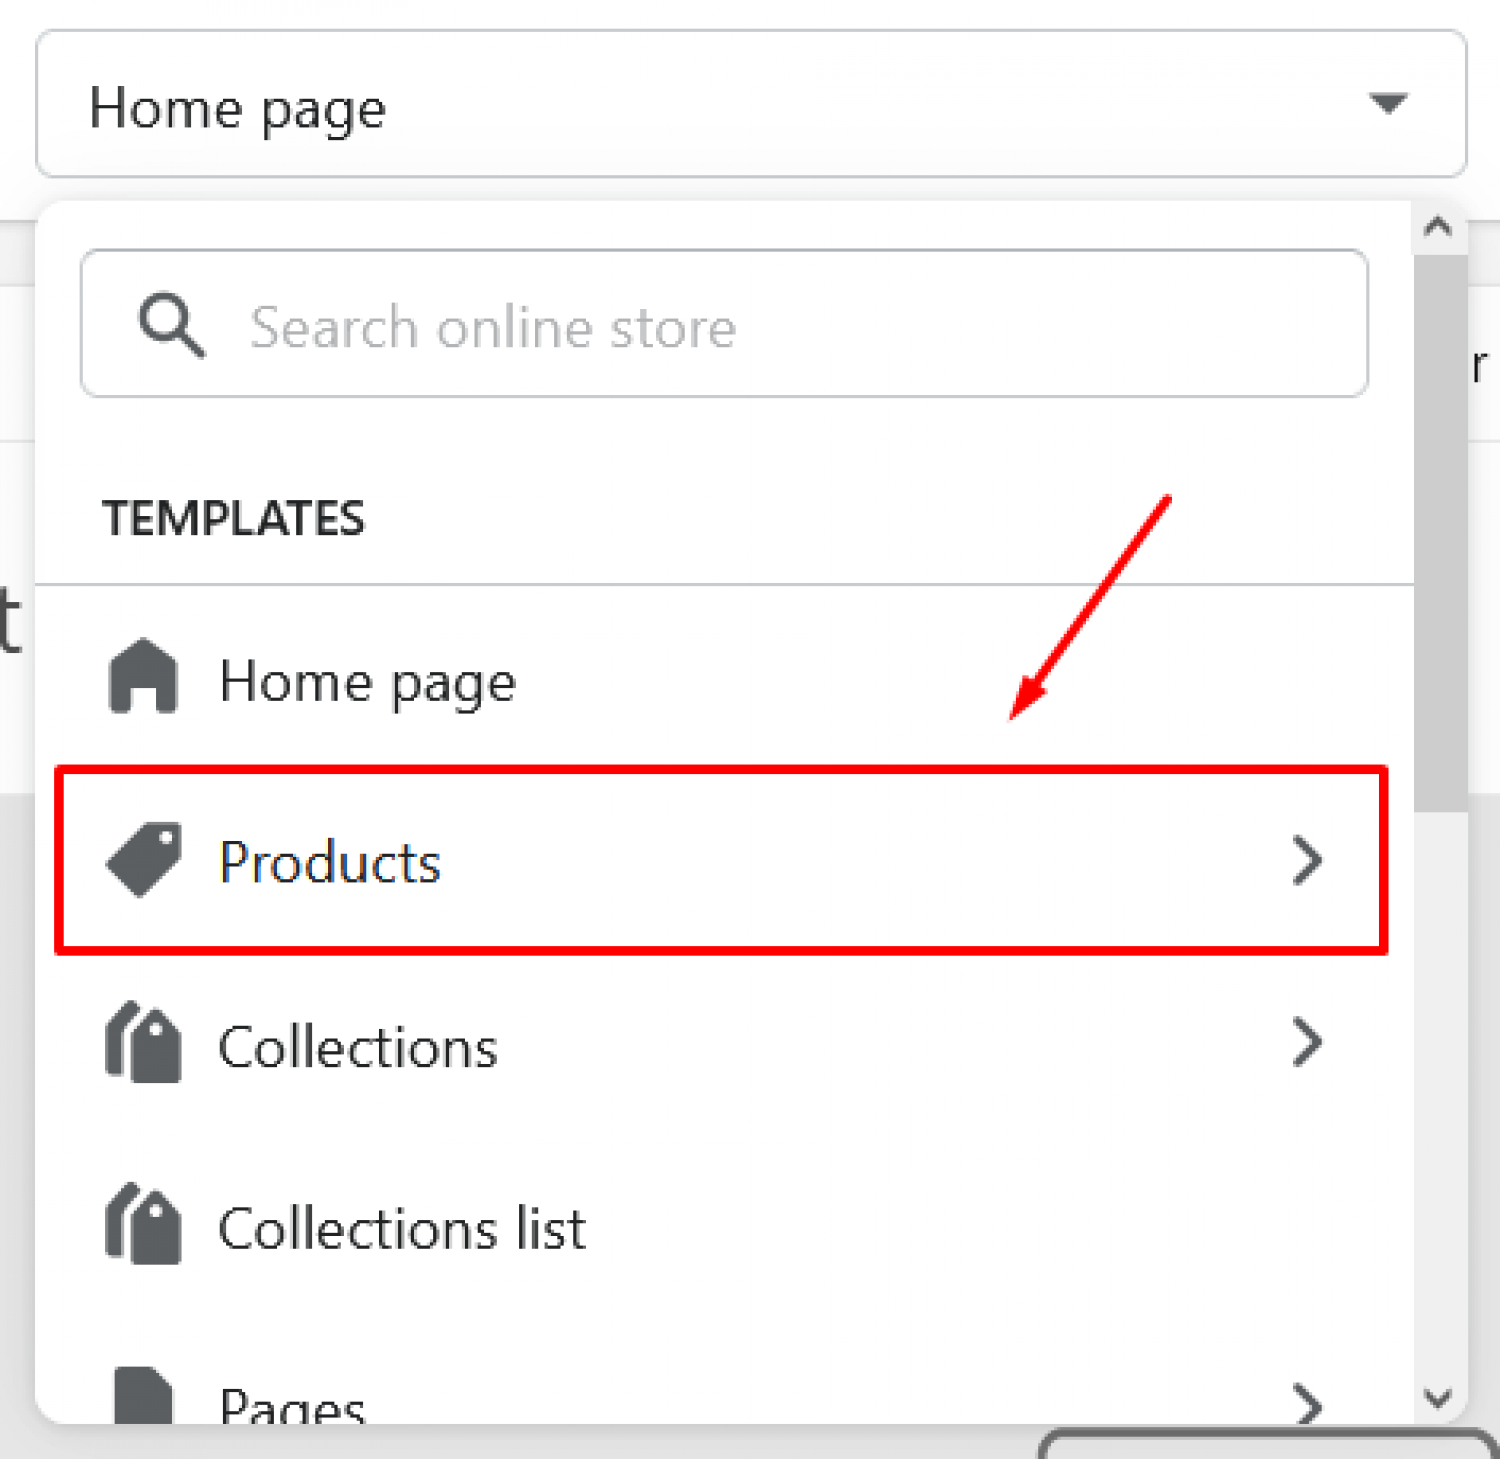
Step 3: Select Default product or any other template:

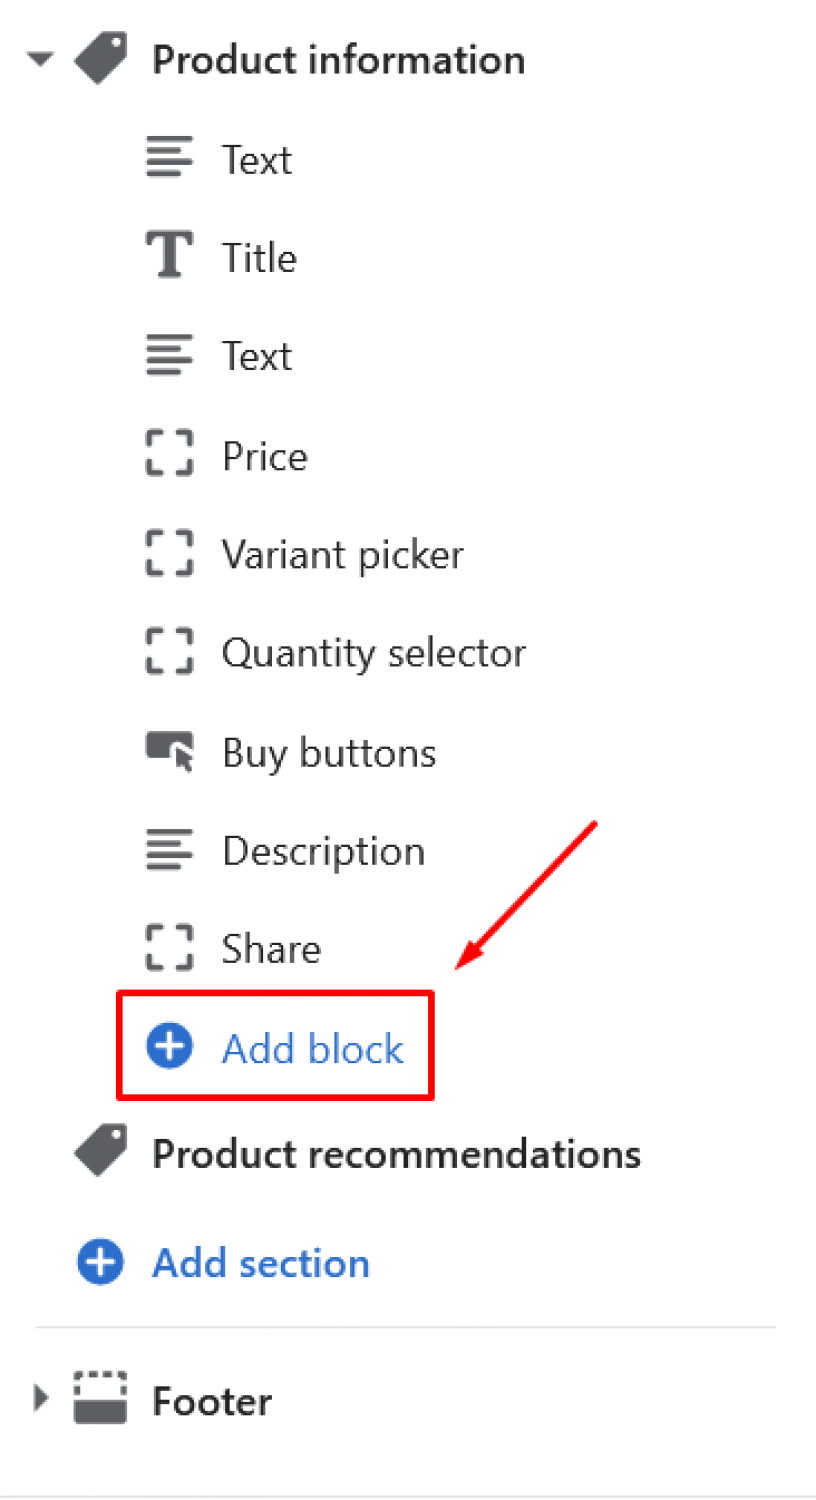
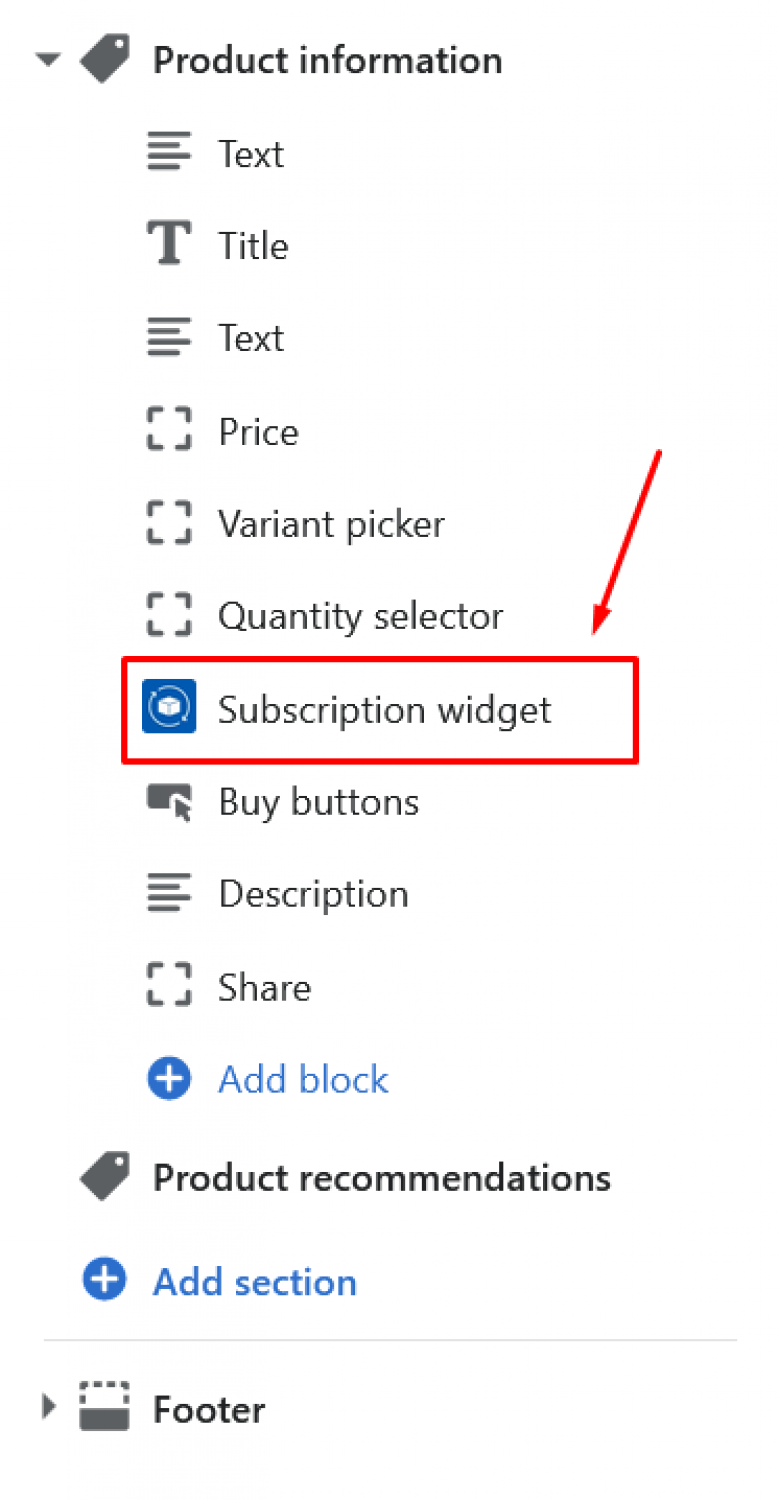
Step 4: Click Add block:
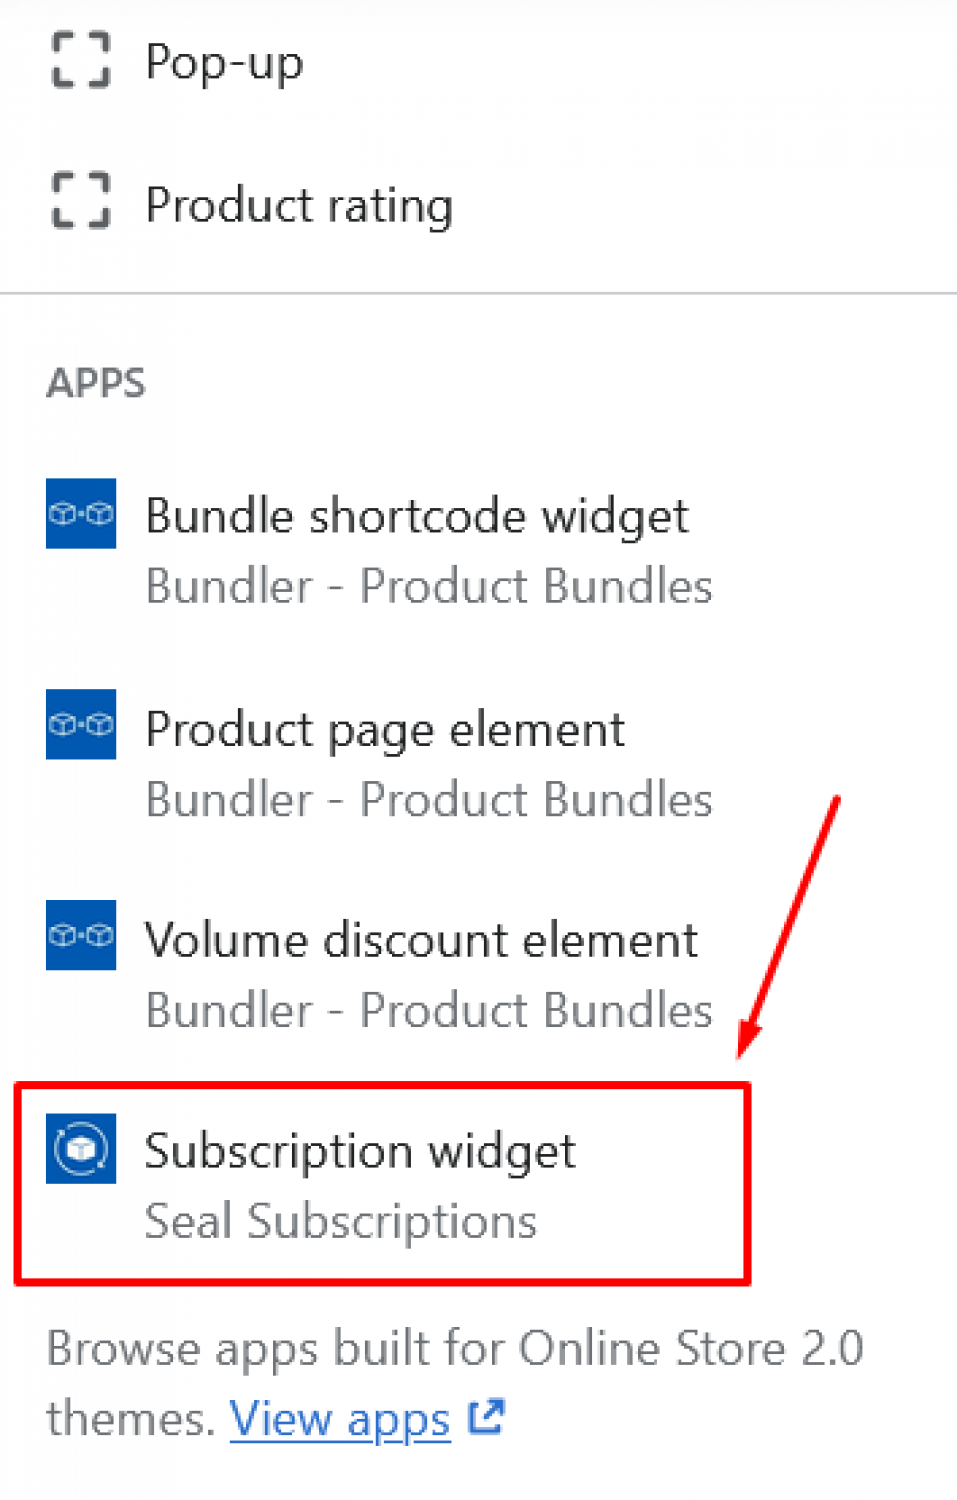
Step 5: Click on Subscription widget:
Step 6: Move the widget to the desired position (preferably above the buy buttons):
Save your theme and you are done!
Add subscription widget to the product pages in older themes
Step 1: Open you Shopify theme files (Online store -> Actions -> Edit code)
Step 2: Open your product template liquid file
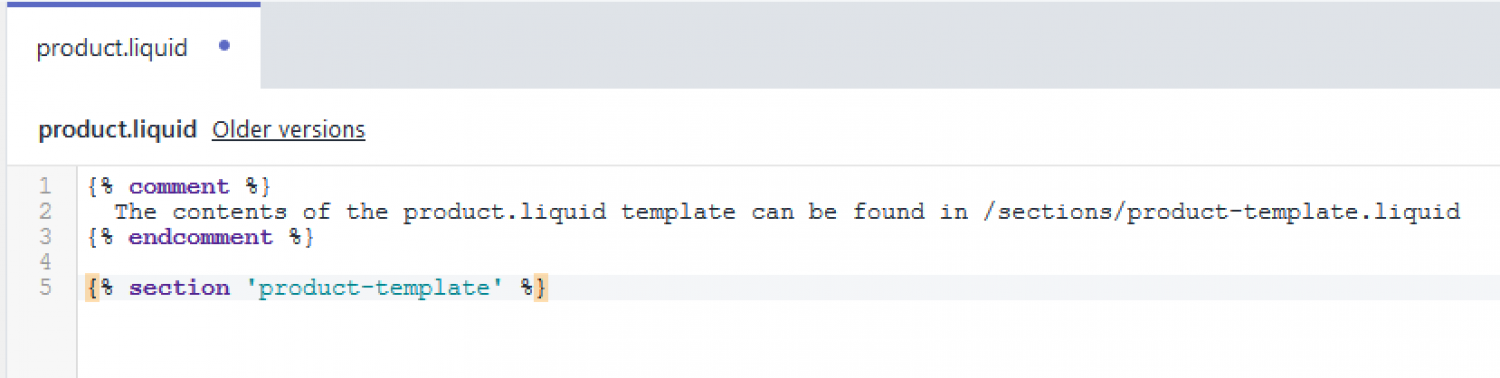
It is usually named product-template.liquid and is located in Sections folder. If you are not sure which product template your shop uses, then open the product.liquid file in Templates folder. There is usually a line telling you where you can find your product section, just like in the screenshot.
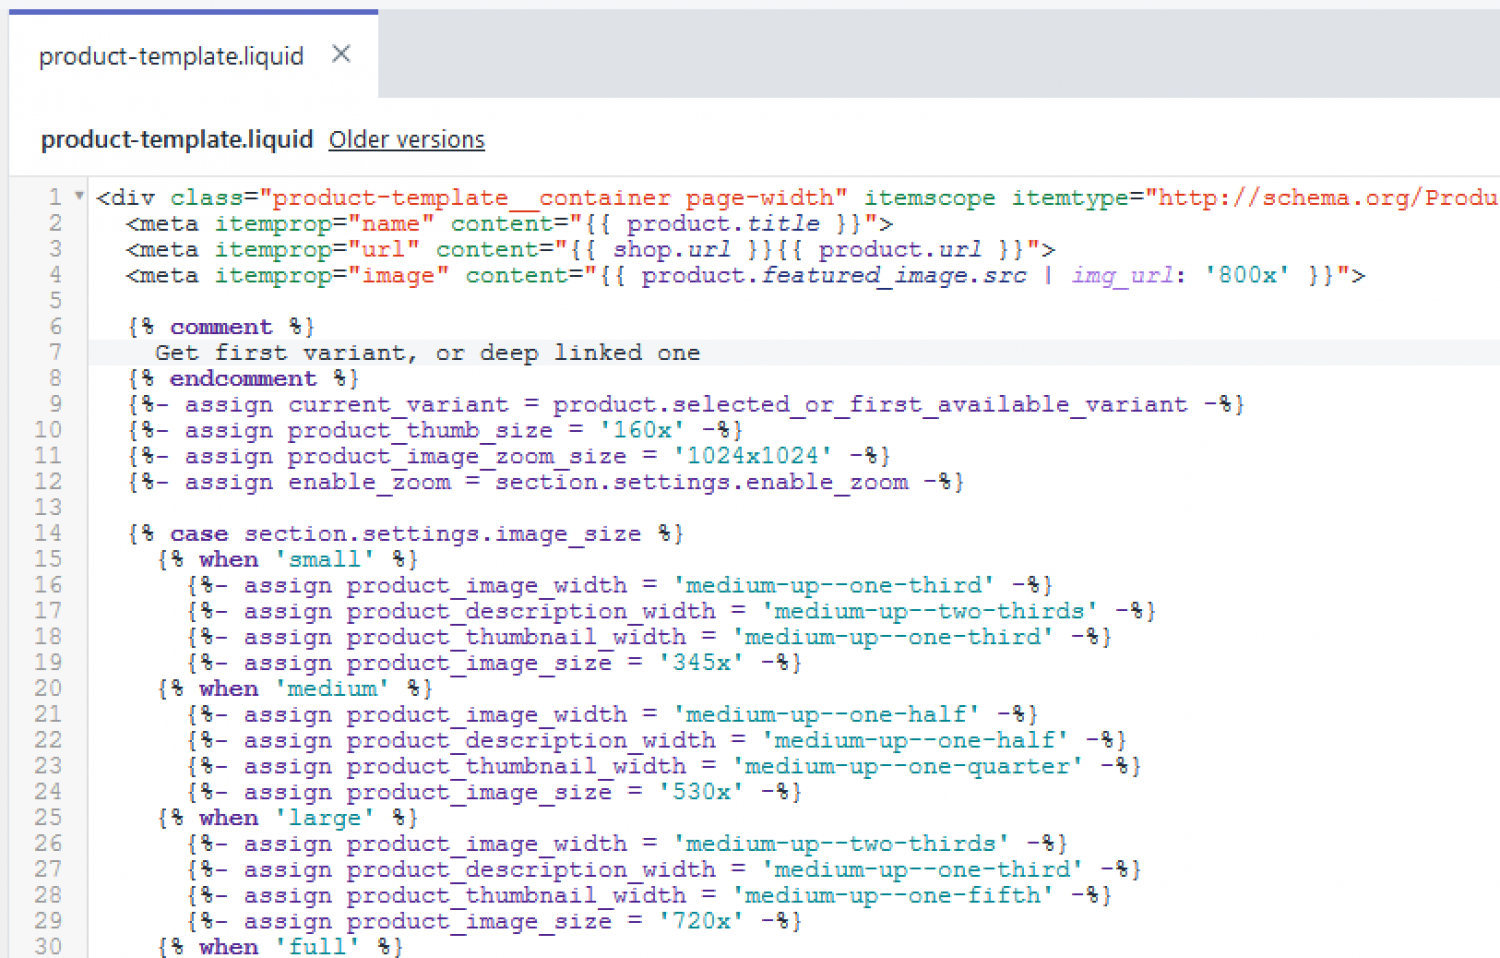
The product template which you want to open, usually looks similar to this one:
Step 3: Find the product FORM element
Start scrolling down and find the add to cart form element which usually starts with
{% form 'product'. You can also use the search function
to find it faster.
The widget has to always be wrapped in the form element which contains the add to cart button.
Step 4: Add the target element
Now that you have found the form element, find a place where you want to display the subscription widget and add the following code there.
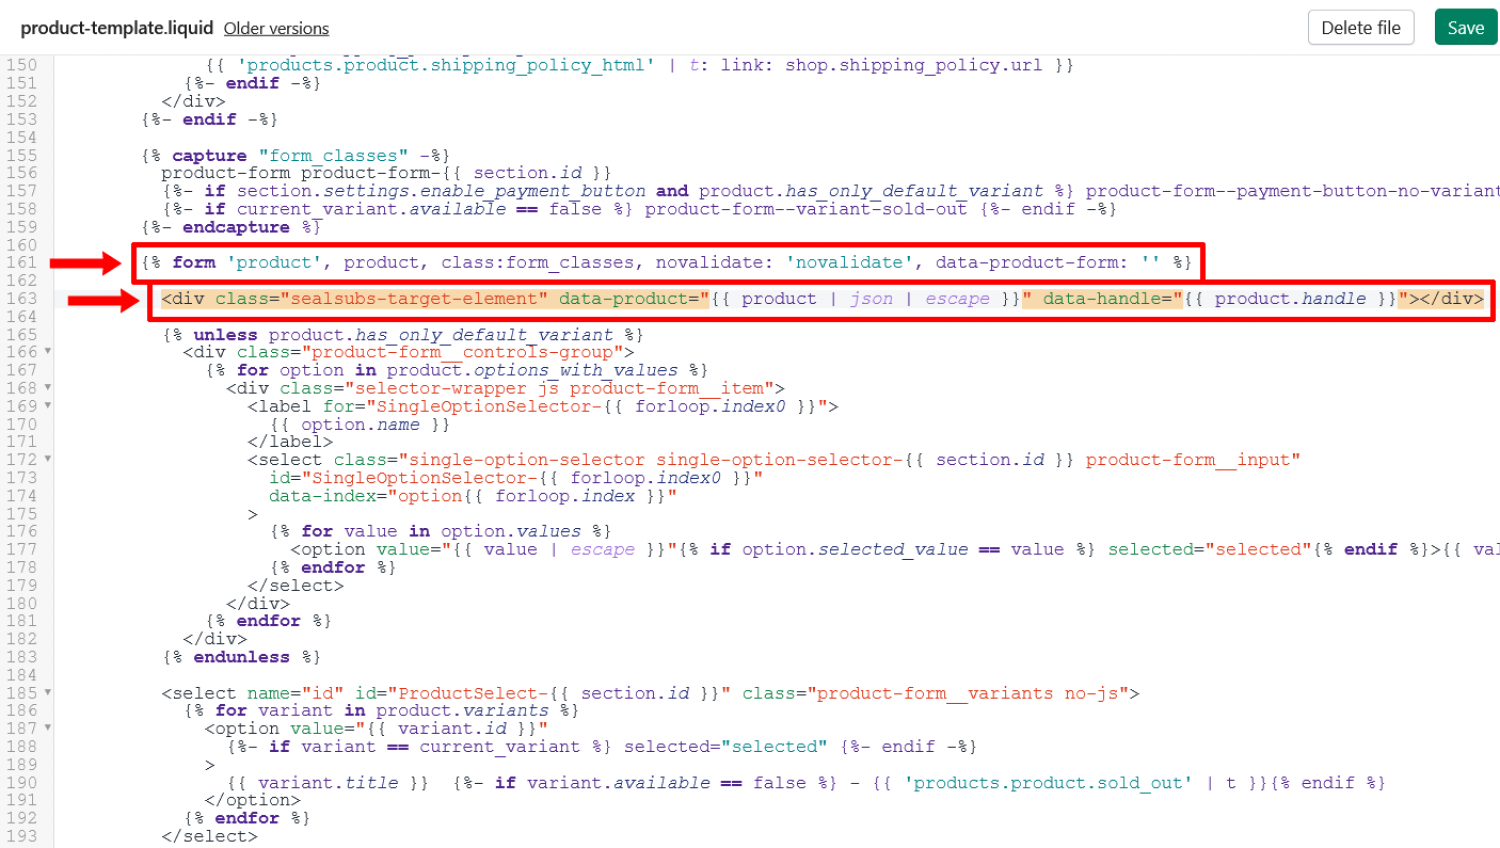
<div class="sealsubs-target-element" data-product="{{ product | json | escape }}" data-handle="{{ product.handle }}"></div>
Here is a screenshot of how it looked in our template after we added the code. You can see the start of the form element and the
<div class="sealsubs-target-element" data-product='{{ product | json | escape }}' data-handle="{{ product.handle }}"></div>
marked in the screenshot.
Step 4: Check if the subscription widget is now displayed on your product page.
And you are done :) If you need any help, you can always contact us at support@sealsubscriptions.com. Additional step (optional): Add subscription widget to featured products on your homepage (if the widget isn't already showing up there)
You can add the same element to featured product sections to show the subscription widget on featured products or anywhere else in your shop. The app will recognize the target element and render the subscription widget in it.
The featured product template is usually located in your Sections folder and is named featured-product.liquid.
The steps for adding the widget there are similar to the ones above. The important thing is to add the target element into your form element, so the subscription properties will be passed to the cart.